OpenGL 参数方程绘制球
在 OpenGL 中用参数方程绘制球体
效果图
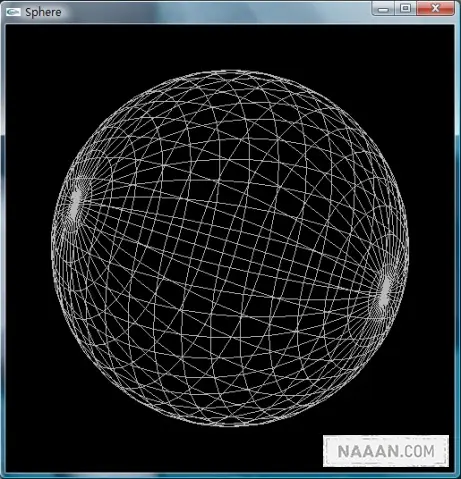
程序的代码
Sphere.h |
Sphere.h |
首先要声明的是如果想运行上面的程序,在你的计算机上必须装有 GLUT 开发工具,并要将 GLUT 的头文件和库文件添加到你开发环境的头文件和库文件的目录中,并且让编译器能找到 GLUT 的动态连接库,即 GLUT32.DLL。具体请参见 GLUT 的安装方法……
进入正题:
1 头文件
先是 Sphere.h,包含了 windows.h 头文件和一些其他可能用到的标准 C 头文件,可以直接写到 Sphere.cpp 里面。接下来在 Sphere.cpp 里面包含 Sphere.h 和 GLUT 的头文件 glut.h
2 自定义宏、类型和结构体
#define pi 3.1415926 |
定义圆周率 pi,后面计算坐标时要用到
#define SOLID 3000 |
定义画球的模式,SOLID 表示画实面球,WIRE 表示画网格球
typedef int SPHERE_MODE; |
定义画球模式的类型,其实是个 int 整形
typedef struct Point3f |
定义记录空间点坐标的结构体 point,GLfloat 类型其实就是 GLUT 里面定义的 float 类型
3 函数声明和实现
void init(void); |
init()、reshape() 和 display() 这 3 个函数是 OpenGL 绘图的一般过程所用的函数,这 3 个函数的函数名可以不同,但形参部分的形参类型必须一样(注),且这 3 个函数在主函数中是依次调用的。
(注: void reshape(int w,int h); 也可作 void resizeWindow(int width,int height))
在 init() 函数里,分别对屏幕背景颜色,投影模式,光照,光源位置等进行了设置,并启用纹理,灯光和深度测试;
reshape() 函数里面,对视口和投影矩阵进行设置;
接下来是 display() 函数,先移动原点坐标到窗口中心位置,再对所要绘制的图形进行一定角度的旋转,设置绘图的颜色,然后调用 drawSphere() 绘制球体。
关于 init(),reshape() 和 display() 这 3 个函数里面的具体过程,请参见 OpenGL 的相关教程。
下面的几个函数是绘制球体所用的,这里先简略给出他们的作用,具体实现将在下一部分详细解析:
int getPoint(GLfloat radius,GLfloat a,GLfloat b,point &p) 函数:
根据半径 radius,a 角(半径与 Z 轴正向的夹角),b 角(半径在 xy 平面的投影与 x 轴正向的夹角)算出球面上点的坐标并记录到 point 类型的参数 p 中。
void drawSlice(point &p1,point &p2,point &p3,point &p4,SPHERE_MODE mode) 函数:
根据实际调用时提供的 4 个点的坐标在空间画四边形,并用 mode 参数确定所画四边形是空心还是实心的。
point* getPointMatrix(GLfloat radius,GLint slices) 函数:
根据提供的半径 radius 和分块数 slices 计算出一系列球面上的点的坐标,储存在一个动态创建的矩阵中,并返回指向该矩阵的指针,要求的分块数越多,计算的点就越多,球面就越光滑,矩阵也就越大。
int drawSphere(GLfloat radius,GLint slices,SPHERE_MODE mode) 函数:
绘球所调用的函数,根据提供的半径 radius 和分块数 slices 在窗体中绘制球体,分块数越大,球面越光滑,mode 参数用于确定要绘制实面球还是网格球。
4 绘球部分
这里绘制的球,其实是个球面。把球面看成是由很多个小的四边形平面构成的,这样就可以通过绘制这些小的四边形平面来构成整个球面。而对于两极部分,需要用三角形将球面两端封起来,如果把这些三角形看作是有两个顶点重合的四边形,问题就得到进一步的简化。因此只需知道球面上一系列点的空间坐标,就可以利用这些点来绘制四边形从而得到整个球面。把整个球面展开,可见球面上这些点构成的是一个矩阵,而这个矩阵中纵横相邻的四个元素的坐标正好构成的就是球面上的一个小平面。
如何获取球面上点的坐标?
利用球的空间坐标参数方程
x=r·sin(α)·cos(β) |
r 是球的半径,α角是半径与 Z 轴正向的夹角,β角是半径在 xy 平面的投影与 x 轴正向的夹角,他们的取值范围是
0≤r≤∞ 0≤α≤π 0≤β≤2π |
因此函数 getPoint() 就是通过此参数方程来获得空间点的坐标;
int getPoint(GLfloat radius,GLfloat a,GLfloat b,point &p) |
值得注意的是 sin() 和 cos() 函数的参数是弧度角,而形参传入的是角度角,因此需要进行转换。
获取球面坐标矩阵
形参 slices 确定取点的间隔大小。
α角的大小是 0180 度,β角的大小是 0360 度,因此我们在 z 轴方向,每隔 180/(slice-1) 取一横列的点作为α角,在垂直于 z 轴的平面上,每隔 360/slice 取一纵列的点作为β角。由于β角的范围是α角的两倍,所以矩阵横向取点的个数是纵向取点的两倍。接下来就是动态分配内存空间,然后通过循环为矩阵中的元素,即球面上的点的坐标赋值。这里调用 getPoint() 这个函数来计算空间点坐标。虽然分配出来的空间是线性的,但可以通过元素的下标计算确定该元素在线性空间的位置。
point* getPointMatrix(GLfloat radius,GLint slices) |
四点绘面
void drawSlice(point &p1,point &p2,point &p3,point &p4,SPHERE_MODE mode) |
形参 mode 确定了绘图的模式,当其为 SOLID 时,用 GL_QUADS 模式绘实平面,当为 WIRE 时,就用
GL_LINE_LOOP 绘制首尾相连的四条线。注意最后要用 glEnd() 结束对该平面的绘制,否则会得到「怪异」的结果。
绘制球面
int drawSphere(GLfloat radius,GLint slices,SPHERE_MODE mode) |
这就是绘制球面的主框架函数了,先调用 getPointMatrix() 来产生球面点矩阵,并用局部变量 mx 记录该矩阵在内存中的位置。接下来就是把该矩阵上记录的点用 drawSlice() 函数绘成平面。例如 mx[0,0],mx[0,1],mx[1,1],mx[1,0] 这四个元素中记录的就是沿逆时针方向构成球面上第一个平面的 4 个点了。要注意的是,在矩阵的横向上,最后一列点需要和第一列点连起来再绘制平面,这样产生的球面才是封闭的。在函数最后要把动态分配的内存空间释放掉,不然会造成内存泄露。如果绘制成功,函数返回 1,否则返回 0。
有了上面几个函数就可以在直接调用 drawSphere() 函数来绘制不同大小,不同精度和不同模式的球了。
via: http://blog.163.com/tianshi_17th/blog/static/48564189200832992845889/